
As much as I like being cozy on the couch in a t-shirt and gym shorts, I like looking polished during the day. Whether I’m at home or out and about, looking put together helps me feel put together. Many times, my outfit consists of a sturdy pair of dark wash jeans, a colorful blouse, and strong flats. It’s an ensemble that is comfy enough to allow me to take care of my household tasks without feeling restricted but also professional enough that I feel confident and poised in approaching those tasks. When things get extra dirty (i.e. meal time with baby), an apron always helps!
Keeping my wardrobe in tip-top shape requires some basic laundering, storing, and mending skills. This applies to my husband as well, who wears dress shirts even more often than I do! I did some digging on caring for our beloved button-downs, and I discovered a few key skills to keep under my belt.
Why care for dress shirts?
Giving any kind of clothes the cleaning, storing, and mending they need helps preserve them. Button-down shirts for men and women are a common go-to to upscale an outfit, so it’s important to keep our supply of them in good condition.

It might be quicker and simpler to throw button-downs in the hamper every day, wash them in a generic mix of laundry, and crumple them in a drawer or crowded closet, but such treatment is more likely to make them tear, lose buttons, and fade much more quickly. That means more trips to the department store to replace them, which means more time and money spent unnecessarily. Caring for dress shirts not only saves money, but it also makes the occasional purchase of a quality garment worthwhile; you know it will last.
Besides the practical benefits, keeping dress shirts in good condition keeps our appearance and mood lifted throughout the day. My husband and I are bound to feel better in a nicely pressed button-up than in one that’s frayed, faded, or missing buttons. Putting our best selves forward with our outfits helps us put our best effort into our daily work and dealings with people. In short, everyone benefits from this attention to detail!
General care
Because we’re usually not as active while wearing dress shirts and blouses, they’re typically not dirty enough for the hamper after one day. If you find a little smudge or small stain, try to treat it locally by scraping it, padding it with a damp washcloth and a smidgen of soap, or using a stain remover product (I like the “to-go” stain remover sticks that you can find in many drugstores). Keep each shirt on a hanger in closet, allowing for a sliver of space around each item to allow them to air out and stay pressed.
Laundering dress shirts
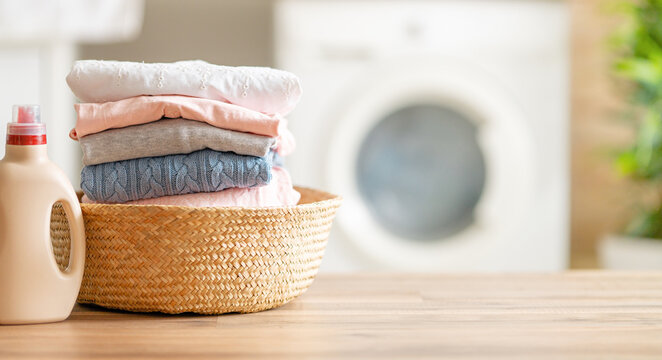
When it is time to wash dress shirts and blouses (in my experience, 1-2 times a week), I need to make sure they end up in the best laundry cycle (see my post on sorting laundry for more). The kind of wash I use depends on the material of the shirt, so I try to use tags and care labels as a guide. The general principle to keep in mind is that the hotter your water is, the more thorough and rigorous a wash I’ll get. So I use as warm water as I can without damaging items. Shirts made of sturdy material like cotton can go into a regular cycle, while synthetic blends or anti-wrinkle materials do better in a permanent press cycle. If I have a particularly lacy or delicate item, I’ll go for the gentle cycle or hand wash it.
When it comes to drying, dress shirts and a machine dryer do not mix! The shirts might shrink or get worn down from the heat. Instead, I let them air dry on a hanger or a drying rack.
Some people like to send their dress shirts to a dry cleaning service, which is a good option to save time and ensure that dress shirts and blouses are regularly cleaned and pressed.
Pressing dress shirts
After my shirts and blouses are dry, they still might be wrinkled. In that case, it’s important to iron them before wearing again. It’s ideal to iron while the items are slightly damp, so if I have time on laundry day, I’ll just grab the shirts off the drying rack and iron them right then and there. If I’m ironing them later, I’ll use the spray button on my iron or an empty spray bottle with water to prep the material.

Materials for ironing
- Iron – I use one that has varying levels of heat for different materials and has a spray button so that I can make sure my material is always slightly damp.
- Ironing board (I use a small table-top one to save space, and the narrow end is helpful for pressing sleeves and shoulder parts. My mom uses an ironing pad, which is even more portable and can sit on top of your kitchen island or washing machine. As a third option, a full-sized board gives you more surface area to work with.)
- Hangers – I keep them close by so that I can hang up an item as soon as it’s done.
- Starch spray (optional) – Some people like to starch their shirts for an extra crisp finish.
Procedure for ironing shirts
There are several methods to iron a shirt, but this is the procedure that I’ve found most efficient and effective:
- Collar (inside, then outside)
- Cuffs (inside, then outside)
- Shirt front (side with buttons, then side with holes)
- Back
- Sleeves (with cuffs buttoned)
Run your iron over each section, always moving the iron away from you and pulling the material away from the iron so that it stays flat and pressed. Iron until the material is just dry. If you over-iron to the point of bone-dryness, you risk damaging the material.
Here’s one my favorite video tutorials for shirt ironing:
Steaming
Since meeting my husband, I’ve discovered the beauty of steaming as well. Steaming is a quick, easy alternative to ironing. It doesn’t press as thoroughly as ironing does, so I still encourage ironing when possible, but when you’re short on time, a good steamer can get a fine job done.
To steam a shirt, hang it on a hanger and button it up completely. When the steamer is hot and ready, gently pull the front of the shirt down so that it’s flat and run the steamer over it, working from top to bottom. Repeat on the back side and with the sleeves, always pulling the material away from the steamer so that it stays flat. When finished, leave the shirt on the hanger for a few minutes to cool off before wearing it.
Sewing buttons

A missing button is one of the most frustrating things to notice about a shirt, so I try to keep an eye out for loose ones as I sort them in the laundry. That way, I can reinforce them before they escape! If a button does go missing, Cheryl Mendelson’s Home Comforts recommends taking a button from the same shirt in a less conspicuous area, then replacing that button with one from your assorted stash (ideally one that looks similar).
Materials for sewing buttons
It’s always a good idea to have a sewing basket or box somewhere at home so that you can pick it up and use it wherever you are. There are several basic tools that are good to keep in that basket, but for the specific purpose of sewing buttons, here are the materials:
- Spool of thread – The sturdiness should match that of the shirt — for silk or other delicate items, use finer thread. As for color, try to match the thread on the other buttons.
- Two sewing needles – One to sew with, and one to place on top of the button so that the stitches aren’t too tight. You could also use a toothpick instead of a second needle.
- Dressmaker’s chalk – This is a homemaking hack I was very happy to discover! Marking the point where I’ll place my button helps me ensure that it stays aligned and not too far from the button hole. Plus, it won’t leave a stain. You can find dressmaker’s chalk online or at a craft store.
- Thread cutter
- Sewing scissors
- Spare button
The key with sewing buttons is tidiness: by using chalk to place it properly, keeping the thread tight, and securing the knots on the back side of the material, I have a good chance of making that shirt look as good as new!
Here’s one of my favorite video tutorials on sewing on buttons:
Resources
“How to Iron a Dress Shirt,” Art of Manliness
“How To Sew On A Button | Quick & Easy Sewing By Hand,” Real Men Real Style
“Sewing,” Cheryl Mendelson (Home Comforts)


